Note: this post was updated May 2013 to reflect the current FB format
“Help!! I am drowning in Facebook Group notifications and emails!!”
This is a cry I hear all too often. Being a member of a Group on Facebook can be an excellent way to stay in touch, keep up to date on events and even to learn. But sometimes, the sheer volume of email and notifications can make being in a Group unbearable.
Before you abandon your Groups, try this! By adjusting your notification settings, you can still visit and engage with the group when you have time but you will not be bombarded with emails or reminders each time someone posts. It is quick and easy and may just save your sanity!
1. Find the Group name in the left hand column under your profile photo and click on it. This will bring you to the Group page.
If you do not see the Group listed, click on the little link that says ‘More’ – all your groups will be listed there.

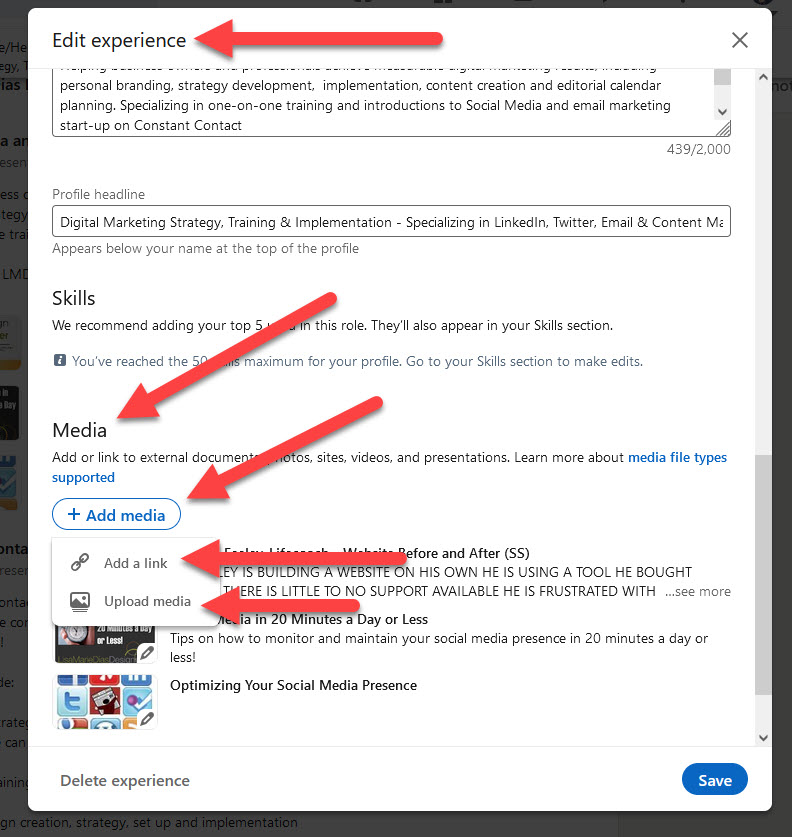
2. Click on the ‘Notifications’ button on the right, under the pictures of the active members.

3. Here you can see the notification options. Pick the one that is appropriate.
All Posts: You will receive a notification every time ANYone posts ANYthing to the group
Friend’s Posts: Often, you will not necessarily be friends with every group member. This allows you to only receive notifications when a Facebook Friend posts in the group (including comments he/she may make on group threads you have not commented on)
Off: You will receive no notifications.
Another option is to turn them off via your notifications:
When you see a notification from the group, like “Marcus Smith posted in XYZ Group”, click on the small “X” to the far right, under the little circle. Note that the “X” will NOT be visible until you roll over the notification

You will then see a pop up with the option to ‘stop receiving notifications from the Group’. Click ‘Turn Off’ and you are done!

Now, I know that some of you that are Group administrators may be annoyed to see me recommending that people reduce the number of ways you can reach your members but I truly believe that by adjusting their settings, they will enjoy and engage with the group rather than become frustrated and leave it.
If you do choose to turn off your notifications, you will need to go visit the Group (again, you click on the link under your profile photo like in step 1 above) to see what has been going on. Remember to visit regularly and to like and comment wherever appropriate!
You may also be interested in my posts on:
How to Leave a Facebook Conversation